How to Choose an LED Panel for Backlit Onyx (2026 Buying Guide)
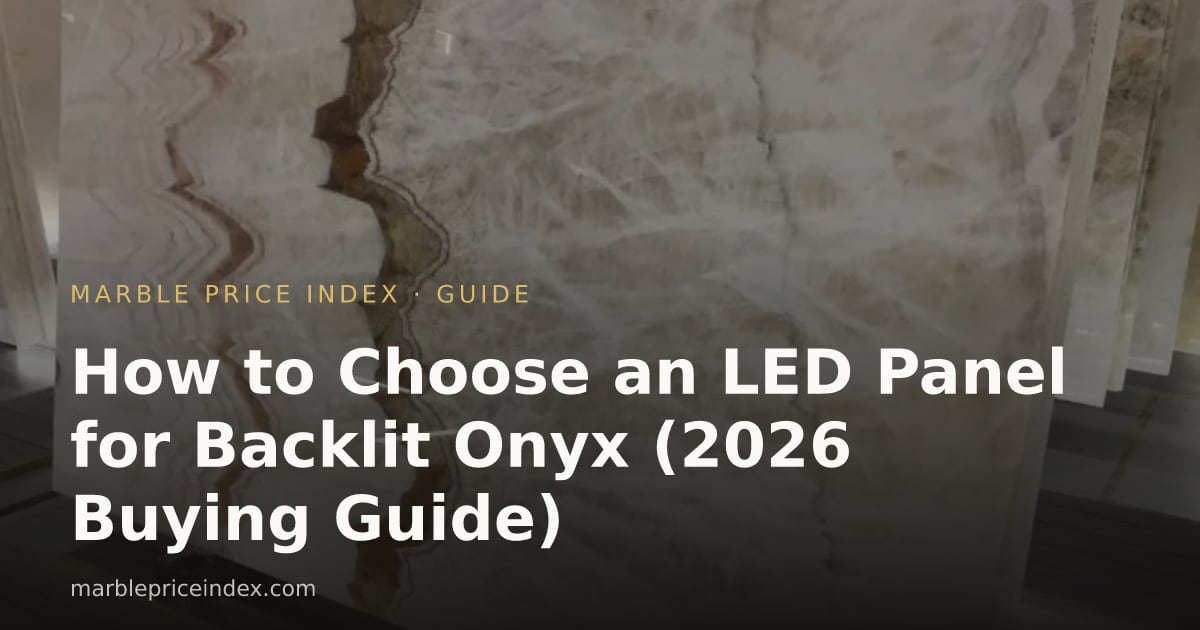
Everyone who calls us about a backlit onyx project starts with the stone — which honey, which amber, how big a bundle. Almost nobody starts with the light source, and that’s backwards. The stone sets the ceiling on how good the glow can look; the LED panel decides whether it actually gets there. We’ve seen a $180/sqft top-grade slab ruined by a $12 strip light, and we’ve seen a mid-grade $75/sqft slab look like a lamp shop centerpiece because the panel behind it was spec’d properly. This guide is about the part of the project people skip: how to pick the light.
We index onyx at $60–200/sqft and the backlit stone feature wall category at $1,800–12,000 per wall as a complete factory kit including the LED panel — both market estimates for August 2026 from our price index. Everything below is built on those bands.
Why the panel matters as much as the stone
Onyx is translucent because it’s a banded calcite with variable density — light passes through the thin bands unevenly, which is exactly what creates the honey-and-amber depth people are paying for. That same variability is why the light source behind it has to be engineered, not improvised. Point-source light — a bulb, a spotlight, a strip of individual LEDs — creates hot spots and dark gaps that track every density change in the stone and every gap between diodes. The result looks like a backlit poster with visible seams, not a glowing slab.
An LED panel — a continuous, even-emission diffuser sheet with LEDs distributed across its full area, not along one edge — spreads light uniformly before it ever reaches the stone. That’s the single spec line that separates a wall people photograph from a wall people complain about within a year.
Panel vs strip: what actually goes wrong
| Light source | What it does behind onyx | Where we still see it used |
|---|---|---|
| Individual LED strip (edge-lit or laid in a grid) | Bright bars or dots visible through the stone, especially at thin (5–6mm) cuts; hot spots concentrate heat unevenly | Budget DIY installs, strips bought off a hardware-store shelf |
| Edge-lit acrylic diffuser panel | Better than raw strips but falls off in brightness toward the panel center on runs over ~3 ft | Small lamp bases, single tiles under 2 sqft |
| Even-emission LED panel (back-lit, full-area diode array + diffuser) | Uniform glow edge to edge, no visible hot spots, even at 5–8mm slab thickness | Factory kits, the spec used in our backlit green feature wall case study |
| Fluorescent light box (older installs) | Even light but bulky, runs hot, dying technology — parts are getting hard to source | Legacy bars and hotel lobbies from before ~2015 |
If a quote doesn’t specify “even-emission panel” or equivalent language, ask what’s actually behind the glass. “LED backlighting” on its own covers everything in that table, including the strip that will disappoint you.
Slab thickness and how it interacts with the panel
Onyx for backlighting is almost always thin-cut to 5–8mm and laminated to low-iron glass or a resin backing — a full 2cm slab passes too little light to glow convincingly except in the thinnest calcite zones. Thickness and panel choice are linked in two ways:
- Thinner cuts (5–6mm) transmit more light and show more color saturation, but they show hot spots from a poor light source more mercilessly — every diode gap is more visible. A cheap strip behind a 5mm panel looks worse than the same strip behind an 8mm one.
- Thicker cuts (7–8mm) are more forgiving of an uneven light source and structurally sturdier for a location that gets touched or bumped, but need slightly higher panel output (measured in lux at the diffuser) to glow at the same intensity as a thinner cut.
The honest trade-off: a 5–6mm cut paired with a genuine even-emission panel is the best combination for saturated color, but it is not the place to cut the light budget to save money. If the project has to economize somewhere, economize on stone grade before economizing on the panel behind a thin cut.
Color temperature: what it does to onyx’s own color
Onyx reads warm — honey, amber, gold-veined white — and the LED color temperature either supports that or fights it. Kelvin ratings for panels used in backlit stone work:
| Color temperature | Effect on honey/amber onyx | Effect on white/green onyx | Typical use |
|---|---|---|---|
| 2700K (warm white) | Deepens amber and honey tones, reads almost fire-like | Can wash green bands toward yellow, muddies white | Residential bars, restaurant feature walls, romantic/intimate spaces |
| 3000–3500K (soft white) | Balanced — amber stays warm without going orange | Green stays true, white stays close to neutral | Most common choice; the safe default for mixed-color slabs |
| 4000K (neutral white) | Reads crisper, less “glowing ember,” more architectural | Best for translucent green and white onyx, and for translucent quartzite alternatives | Commercial lobbies, retail, the spec used in our green feature wall case study |
| 5000K+ (daylight) | Onyx starts to look cold and slightly clinical — rarely chosen | Same | Almost never used for onyx; occasionally for translucent white quartzite |
Most of the backlit onyx projects we’ve supplied land on 3000–3500K, because it’s the temperature that keeps warm and cool banding both looking natural in the same slab. 4000K is the right call specifically when the design brief wants “architectural” over “cozy,” or when the slab leans green or white rather than honey. A dim-to-warm driver — one that shifts toward 2700K as it’s dimmed, the way an incandescent bulb does — is worth the small premium if the space will run the panel at low output most evenings; a fixed-temperature driver held at 3500K and dimmed hard can start to look flat and grey rather than atmospheric.
CRI and dimming — the two specs people forget to ask for
Color rendering index (CRI) measures how accurately a light source reveals true color, on a scale to 100. Specify CRI 90+ for any backlit stone project — the 4000K panel in our feature wall case study ran CRI 90+, and it’s the reason the amber and calcite variation in that slab reads as natural stone rather than a flat color wash. Cheaper panels sold at CRI 80 will light the wall evenly but mute the color contrast that’s the entire reason for choosing a translucent slab in the first place.
Dimming matters for two reasons beyond mood: it extends LED lifespan, and — paired with a dim-to-warm driver — it lets one panel serve both a bright daytime “artwork” mode and a low, warm evening mode without swapping equipment. Spec a dimmer rated for the specific driver installed, not a generic wall dimmer pulled from an electrical supply catalog; mismatched dimmer-driver pairs are the most common cause of visible flicker in backlit stone installs.
What a panel actually costs
Pricing the light source separately from the stone, as market estimates for August 2026:
| Component | Price basis | Typical range |
|---|---|---|
| Even-emission LED panel, sized to run | per sqft of panel face | $18–35/sqft |
| Driver (standard, dry location) | per panel | $80–250 |
| Driver (IP65, wet-zone rated — bars, kitchens) | per panel | $150–400 |
| Dim-to-warm driver upgrade | add to driver cost | +$40–90 |
| Compatible dimmer | per circuit | $35–120 |
| Combined panel + driver, factory-bundled | per sqft, as used in our bar cost guide | ~$40–45/sqft |
Those combined figures roughly match what we’ve published elsewhere: the bar-front case study priced a complete LED panel plus IP65 driver at $2,100 for a 50 sqft run — $42/sqft — and the feature-wall category page prices a full kit (stone, lamination, panel, frame) at $1,800–12,000/wall depending on size and stone grade. The light source is typically 15–25% of a complete kit’s cost, which is exactly why it’s the wrong place to economize once you’ve already committed to a $100+/sqft slab.
Worked case study: specifying the panel for a 24 sqft bathroom feature panel
A homeowner wants a single backlit onyx panel above a bathtub, 4 ft wide × 6 ft tall (24 sqft), honey-and-white banded onyx, 6mm cut. Market estimates, August 2026.
Stone and lamination:
| Line item | Basis | Cost |
|---|---|---|
| Onyx slab, mid-grade | $85/sqft × 24 sqft | $2,040 |
| Thin-cut to 6mm & lamination to glass | $65/sqft × 24 sqft | $1,560 |
Light source — two options compared:
| Option | Panel | Driver | Dimmer | Total light cost |
|---|---|---|---|---|
| A: Budget strip kit | LED strip grid, hardware-store grade | Standard dry-location, $110 | Generic slider, $35 | ~$720 (24 sqft × $12 strip + driver + dimmer) |
| B: Even-emission panel, CRI 90+, 3000K, dim-to-warm | $26/sqft × 24 sqft = $624 | Bathroom-rated (damp location) driver, $220 | Dim-to-warm compatible, $75 | $919 |
The gap between Option A and Option B is $199 — under 3% of the total project cost once stone and lamination are included ($3,600 stone/lamination + framing/install, roughly $6,000–7,000 all in). For that $199, Option B removes visible hot spots at a 6mm cut, renders the honey-and-white banding at CRI 90+ instead of a flatter CRI 80 wash, and uses a damp-location driver appropriate for a bathroom instead of a dry-location unit that voids its own rating the first time steam gets to it. On a project this size, the light source is the cheapest place to overspend by design and the most expensive place to underspend by accident.
Factory kit vs assembling it yourself
Two ways to get a panel behind a slab:
Buy a factory-bundled kit — stone, thin-cut, lamination, panel and driver engineered together and shipped as one crated unit, as described in our feature wall case study. The mill matches panel output to the specific slab’s density before it ships, which is the step a local assembly can’t replicate without a light table on site. This is the route behind the 30–60% factory-direct savings we see across the backlit walls category versus Western installed pricing.
Source stone and light separately, assemble locally — a fabricator laminates the slab, an electrician sources and wires a panel bought from a lighting supplier. This works, but the panel-to-slab match becomes a guess unless someone tests the actual panel against the actual slab before final assembly — the exact test our green feature wall case study flagged as the difference between choosing a slab from a dry photo versus a backlit one.
If comparing quotes, ask specifically whether the panel was tested against the slab it will sit behind, or whether it’s a generic panel sized by sqft alone. The second approach is cheaper and it’s also how hot spots end up in a finished wall six months after everyone signed off on samples.
Alternatives to onyx worth lighting the same way
Onyx isn’t the only translucent option, and the panel spec above applies equally to alternatives:
- Cristallo Quartzite, $90–200/sqft, Mohs 7 — far tougher than onyx, worth the premium for anywhere the panel will take physical contact, covered in our quartzite hub.
- Patagonia Quartzite, $100–250/sqft — a premium translucent option with a cooler palette that pairs well with 4000K rather than 3000K panels.
- Green marble, $30–100/sqft — translucent in select bundles rather than as a rule; always request the backlit photo before committing, since green marble’s translucency is far less consistent bundle-to-bundle than true onyx.
The LED spec — even-emission panel, CRI 90+, driver rated for the location — doesn’t change by stone. What changes is color temperature (cooler stones generally read better at 4000K) and, for the harder quartzites, how much less careful you need to be about impact near the panel edge.
Sourcing factory-direct from China
Iran, Turkey, Mexico and Pakistan supply most onyx block, and a large share of it is processed at Chinese mills, where thin-cutting, vacuum-resining and light-panel integration have scaled into a repeatable production line rather than a one-off fabricator job. Buying panel and stone as one factory kit — rather than a slab from a Western yard paired with a locally sourced light — is where most of the saving in the tables above comes from. Our guide to importing marble from China covers container logistics if the panel kit is shipping alongside a larger stone order.
Run your own panel dimensions and slab size through our cost tools, or send the space and a reference photo through the quote form — the mill returns candidate slabs, a backlit test video showing the actual panel behind the actual stone, and a factory price, usually within 48 hours.
FAQ
What color temperature is best for backlit onyx?
3000–3500K is the safest default — it keeps amber and honey tones warm without pushing green or white banding toward yellow. Choose 4000K for a more architectural, less “cozy” look, especially on green or white-leaning onyx, and avoid 5000K+, which reads cold against calcite’s natural warmth.
Do I need a special LED panel for onyx, or will any LED light work?
Use a continuous even-emission panel, not LED strips or a point-source bulb. Strips and spotlights create visible hot spots and dark gaps through translucent stone, especially at the 5–6mm thickness most backlit onyx is cut to. A panel spreads light uniformly before it reaches the stone.
How much does an LED panel add to a backlit onyx project?
Market estimates for August 2026: $18–35/sqft for the panel itself, plus $80–250 for a standard driver or $150–400 for a wet-zone-rated one, plus $35–120 for a compatible dimmer. As a factory-bundled component it typically runs $40–45/sqft combined, roughly 15–25% of a complete kit’s total cost.
What’s the difference between CRI 80 and CRI 90 for a backlit onyx wall?
CRI 90+ renders the natural color variation in the stone — the amber-to-honey shift, the calcite windows — much more accurately than CRI 80, which lights the wall evenly but flattens that contrast into a more uniform wash. For a project chosen specifically for its color banding, CRI 90+ is worth the small premium every time.
Can I use a bathroom-rated driver outdoors, or vice versa?
No — match the driver to the location. A dry-location driver used in a damp bathroom or bar zone voids its own rating and is a genuine fire and shock risk once moisture reaches it; a damp-rated or IP65 driver costs more but is the correct spec anywhere splashes, steam or wash-downs happen.
Should I economize on the LED panel to afford a better onyx grade?
No — the panel is typically only 15–25% of total project cost, and a poor light source undermines even a top-grade slab, while a properly spec’d panel makes a mid-grade slab look considerably better than its price point. If the budget is tight, look first at slab grade or panel size before cutting the CRI or evenness spec.